
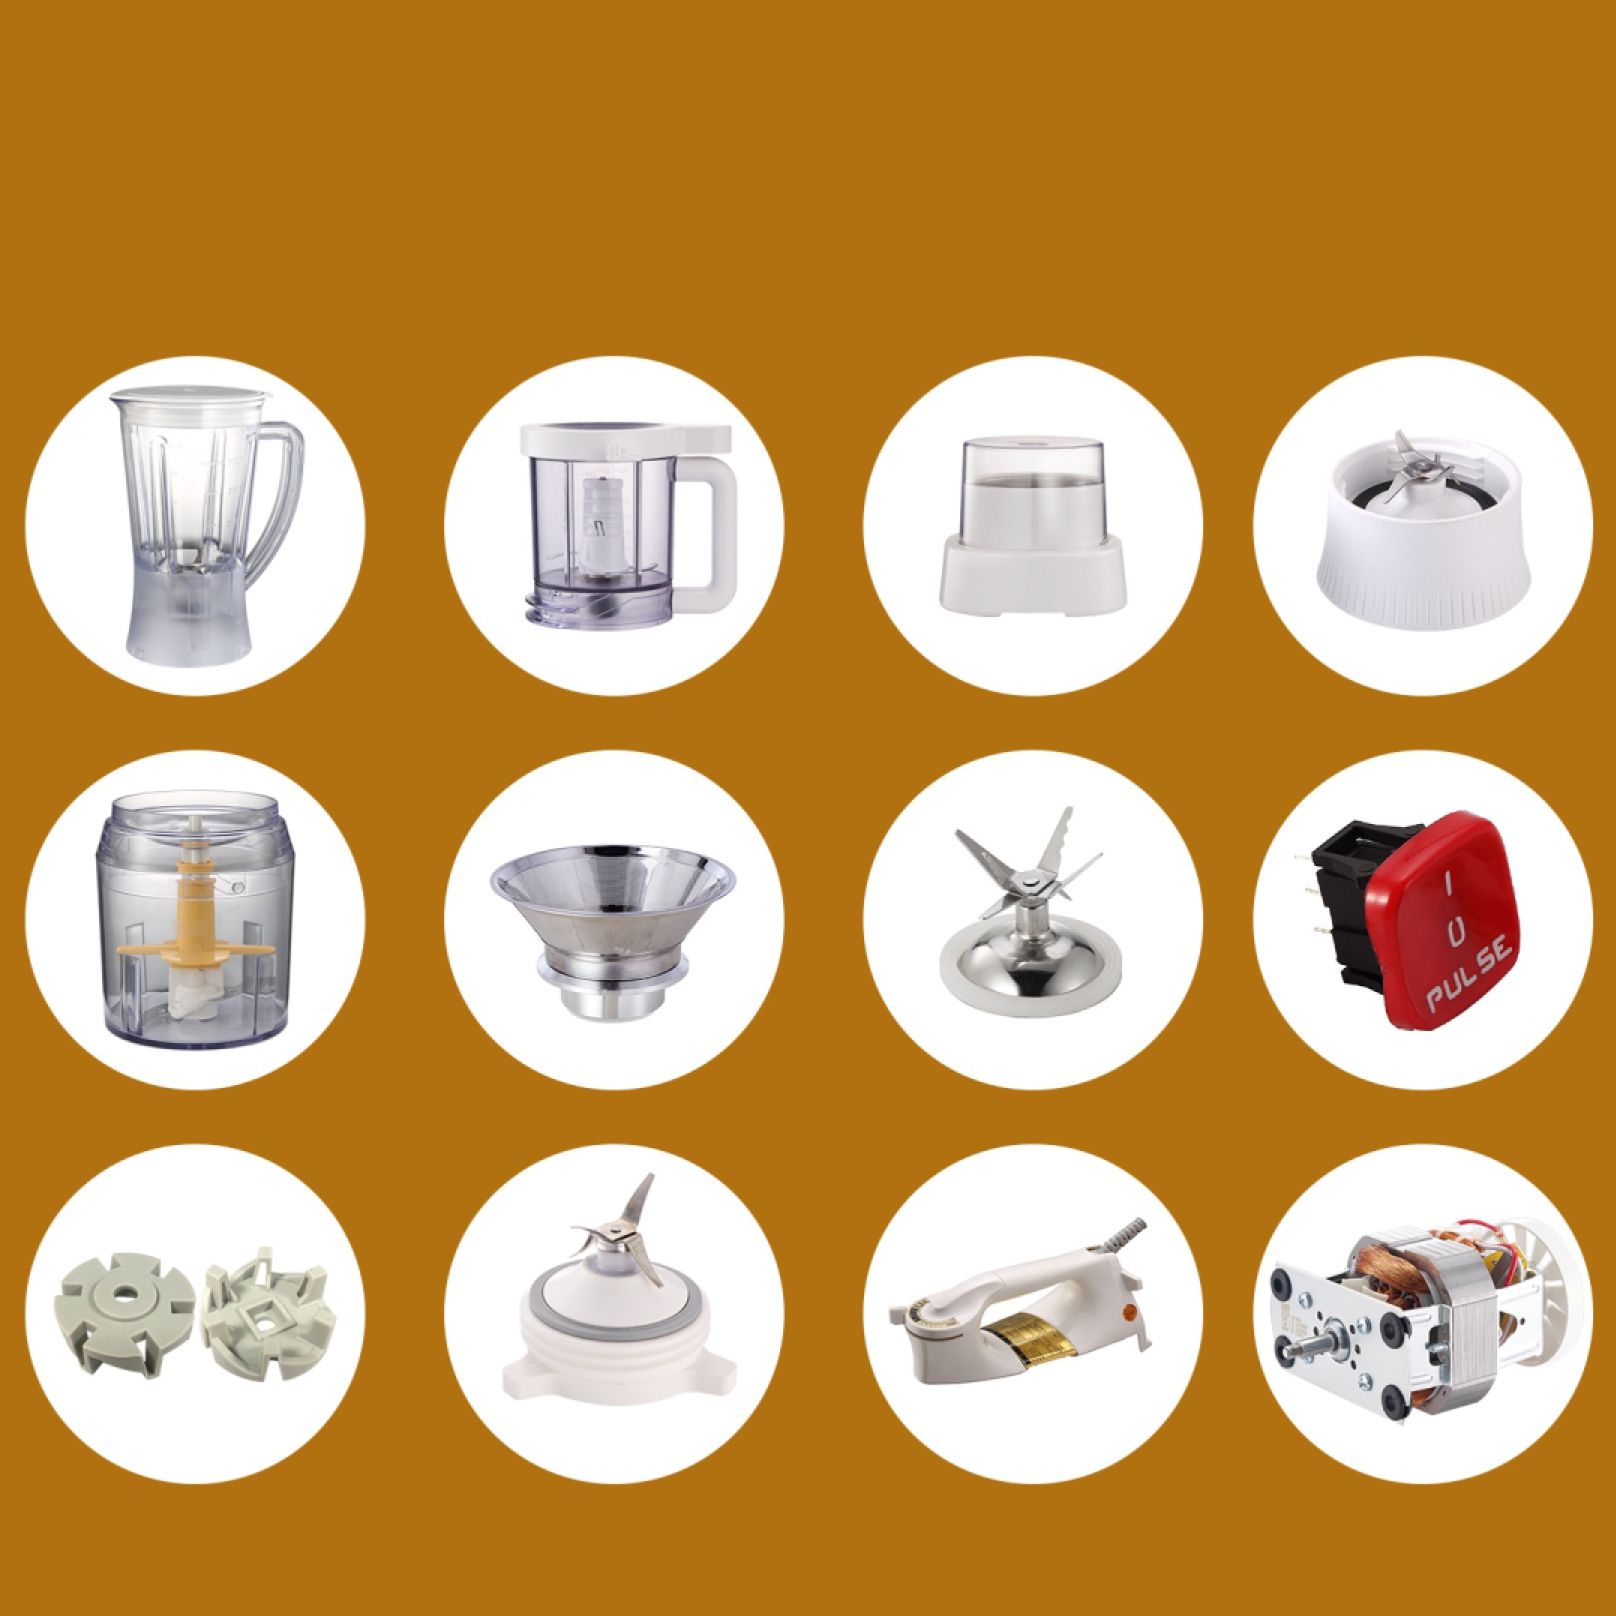
Key Blender Parts: Blades, Jugs, Lids, and Drive Couplings
The foundation of any blender maintenance strategy lies in understanding its core mechanical elements. These four critical components are essential:
- Blades: Typically stainless steel, they handle ingredient pulverization. Look for dull edges or bent tips as replacement indicators.
- Jugs: Made from glass, Tritan, or polycarbonate, jars endure daily stress. Cracks or cloudiness signal wear.
- Lids: Ensure airtight seals to prevent leaks during high-speed blending. Warped lids compromise safety.
- Drive couplings: These plastic or metal connectors between the motor and blade assembly wear out every 2–3 years with regular use.
Function and Wear Indicators of Blender Blade Assemblies
Blade assemblies combine cutting efficiency with structural integrity. A well-functioning unit rotates smoothly without wobbling, while worn components often cause:
- Unevenly chopped ingredients
- Increased motor strain (audible whining)
- Visible corrosion or pitting
Premium models use laser-cut, multi-tiered blades that stay sharper 40% longer than standard designs. Always replace the entire assembly—not just individual blades—to maintain balance.
Critical But Often Overlooked Parts: Gaskets, Seals, and Jar Pads
While blades and jars dominate attention, 73% of blender failures stem from degraded sealing components:
| Component | Function | Failure Signs |
|---|---|---|
| Jar gasket | Prevents leaks at blade junction | Liquid seepage, food residue |
| Lid seal | Maintains vacuum during blending | Difficulty removing lid |
| Anti-vibration pad | Reduces noise and jar slippage | Increased operational noise |
Replace rubber seals every 12–18 months, especially in high-humidity environments where mold risks escalate.
How to Identify Blender Parts Correctly to Ensure Compatibility
Accurate part identification prevents 90% of installation errors:
- Check model numbers: Found on motor bases or original documentation.
- Measure dimensions: Blade shaft diameters vary between 8mm (home models) and 12mm (commercial units).
- Material matching: Use only heat-resistant seals for blenders handling hot soups.
- Consult compatibility charts: Leading manufacturers provide digital databases updated quarterly.
When sourcing blenders spare parts, always verify thickness specifications for gaskets and torque limits for drive couplings to prevent cross-threading issues.
Choosing Compatible Blender Jars and Materials for Durability
Glass vs. Plastic vs. Tritan: Comparing Blender Jar Materials
Glass jars have scratch-proof surfaces that do not absorb odors or stains, which supports hygienic blending of acidic or oily sauces. The only drawback is that they are 2-3x more massive than the plastic choices and can be crushed if dropped on the ground. Plastic jars (BPA-free) are standard, less prone to shattering than glass and more naturally dusted with cloudiness or scent. There’s also Tritan® copolyester, which offers 30% weight saving vs glass and superior clarity that lasts after more than 500 dishwasher cycles without any cracking associated with cheaper plastic options.
Ensuring Compatibility Across Blender Models and Brands
Blade couplings and jar bases vary significantly between brands:
- Vitamix® jars use a square drive shaft, while Oster® models often employ hexagonal designs.
- NutriBullet® containers require reverse-thread compatibility.
Always cross-reference your blender’s horsepower rating and attachment system before purchasing replacement jars.
Safely Upgrading to Different Jar Sizes and Configurations
Increasing jar capacity requires matching the blender’s motor power:
- Single-serve jars (12-20 oz) work best with 600-800W motors.
- Batch-processing jars (40-64 oz) require 1,500W+ systems.
Never exceed your blender’s recommended viscosity limits, as thicker mixtures demand 20-30% more torque.
OEM vs Third-Party Blender Spare Parts: Balancing Quality and Cost
Original Equipment Manufacturer (OEM) vs. Third-Party Parts: Pros and Cons
| Aspect | OEM Blender Parts | Third-Party Blender Parts |
|---|---|---|
| Cost | 30-50% higher | Budget-friendly |
| Warranty Compatibility | Fully preserves coverage | May void warranties |
| Material Quality | Matches original specs | Varies by supplier |
| Availability | Brand-authorized channels | Multiple retail sources |
High-wear components like blades and drive couplings generally perform best as OEM replacements, while less critical parts like lids often work well as third-party alternatives.
Impact of Non-OEM Parts on Blender Warranty and Reliability
72% of blender manufacturers explicitly void warranties when non-OEM parts cause subsequent failures. While third-party seals and gaskets might initially save costs, inconsistent material hardness in aftermarket blade assemblies can accelerate motor wear by up to 40%.
Long-Term Maintenance With Mixed Component Sourcing
Implement a hybrid replacement strategy:
- Critical components: Always use OEM for blade assemblies, motor brushes, and thermal fuses.
- Moderate-stress parts: Consider OEM or certified third-party for jars and blade bearings.
- Low-impact items: Third-party lids, tampers, and recipe books often provide adequate performance.
Brand Support and Availability of Blender Replacement Parts
Replacement Parts for Major Brands: Vitamix, KitchenAid, Nutribullet, Oster
When sourcing blenders spare parts, brand-specific support varies:
- Vitamix leads with a 10-year parts availability guarantee.
- KitchenAid provides widespread compatibility across its product lines.
- Nutribullet users report longer wait times for specialized components.
- Oster balances affordability and accessibility, with 80% of parts available online.
Vitamix and Long-Term Part Availability: A Benchmark in Brand Support
Vitamix guarantees replacements for blenders dating back to 1989—a policy matched by only 12% of competitors. This commitment reduces premature appliance replacement, with users averaging 15+ years of blender lifespan.
Regional and Retailer Differences in Spare Parts Availability
North American users access 30% more OEM components than European counterparts due to centralized distribution hubs. Authorized retailers stock 2.8x more genuine parts than third-party sellers.
Maximizing Blender Lifespan with Proper Maintenance and Upgrades
Preventing Leaks and Odors: Gasket Function and Timely Replacement
Replace rubber or silicone gaskets every 6-12 months depending on usage frequency. A 2023 survey showed 68% of motor failures traced to liquid ingress from degraded seals.
Signs of Gasket and Seal Degradation: When to Replace
- Visible wear: Cracks, warping, or permanent creases.
- Texture changes: Stiffness in rubber components.
- Operational clues: Leaks during blending.
Cleaning and Inspection Routines for Extended Component Life
| Maintenance Task | Frequency | Key Benefit |
|---|---|---|
| Post-use wash with mild detergent | After every use | Prevents residue buildup |
| Blade edge inspection | Weekly | Identifies chipping/dulling |
| Jar seal examination | Monthly | Detects early gasket wear |
| Drive coupling lubrication | Biannually | Reduces friction wear |
Avoid abrasive scrubbers that scratch plastic surfaces. Studies show blenders with consistent cleaning regimens last 50% longer.
Enhancing Versatility with Accessories and Interchangeable Parts
Expand functionality through OEM-compatible accessories like tamper sticks or emulsifying blades. Third-party attachments must match original torque ratings—85% of performance issues stem from incorrect power transmission specs.
FAQs
What are the primary indicators that blender blades need replacement?
If you notice dull edges, bent tips, unevenly chopped ingredients, increased motor strain, corrosion, or pitting, it is time to replace your blender blades.
How often should rubber seals and gaskets be replaced?
Rubber seals should be replaced every 6–12 months depending on usage frequency and environmental factors such as humidity.
What is the difference between OEM and third-party blender parts?
OEM parts maintain warranty coverage and match original specifications, while third-party parts are more budget-friendly but may void warranties and have varying quality.
How can I ensure compatibility when sourcing blender spare parts?
Check model numbers, measure dimensions, match materials, and consult compatibility charts provided by manufacturers to prevent installation errors.
What maintenance routines should I follow to extend the lifespan of my blender?
Regularly wash the blender with mild detergent after each use, inspect blade edges weekly, examine jar seals monthly, and lubricate drive couplings biannually.
Table of Contents
- Key Blender Parts: Blades, Jugs, Lids, and Drive Couplings
- Function and Wear Indicators of Blender Blade Assemblies
- Critical But Often Overlooked Parts: Gaskets, Seals, and Jar Pads
- How to Identify Blender Parts Correctly to Ensure Compatibility
- Choosing Compatible Blender Jars and Materials for Durability
- Original Equipment Manufacturer (OEM) vs. Third-Party Parts: Pros and Cons
- Impact of Non-OEM Parts on Blender Warranty and Reliability
- Long-Term Maintenance With Mixed Component Sourcing
- Brand Support and Availability of Blender Replacement Parts
- Maximizing Blender Lifespan with Proper Maintenance and Upgrades
- FAQs